Getting Cisco AnyConnect VPN Client working with Windows 8.1
The Steps Needed to Get Cisco AnyConnect to work with Windows 8.1
Moving my laptop PC into the Windows 8 experience, I was able to get the Cisco AnyConnect VPN working by taking the following steps. Note that this article does not apply to Windows 8 RT. Windows RT has built in support for Remote Access Server (RRAS) VPNs only, and proprietary VPNs such as AnyConnect will not work with RT. In order to get a Windows RT VPN connection, work with your IT department or this document: Deploy and Configure a VPN for Devices Running Windows RT.
Install or Upgrade the Client Software
First, install the software. If its available to you, upgrade to the 3.x series of the Cisco client. Though you might not actually have to do that to get it working under Windows 8, the interface is definitely cleaner and goes better ascetically with the Metro theme.
The software is usually made available by your IT support team through a support site or centralized file server. They often customize the install to preconfigure the AnyConnect software specifically for your environment. You may have to contact them to get it. Cisco does not seem to make the software available for general download.
Change Registry Settings
- Open the Registry Editor by hitting Windows-R, typing "regedit", and hitting [Enter].
- Navigate to
[HKEY_LOCAL_MACHINE\SYSTEM\CurrentControlSet\Services\vpnva]
- Open DisplayName
- Clean up the entry. It will usually contain garbage before it. Before editing, the entry was
@oem38.inf,%VPNVA64_Desc%;Cisco AnyConnect Secure Mobility Client Virtual Miniport Adapter for Windows x64
After the edit it was simplyCisco AnyConnect Secure Mobility Client Virtual Miniport Adapter for Windows x64
- Click [Ok] and close the Registry Editor
Accept the Certificate
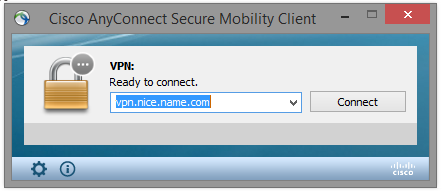
Start the VPN Client -- I usually hit the Search magnifier glass and type "cisco" and select the first entry. Attempt to log in with the named server address and your credentials. If it gives you certificate warnings, allow it to be accepted and trusted. If it doesn't, you may have to launch Internet Explorer with Administrator privileges, navigate to your VPN and accept the certificate that way.
You should at this point be able to establish a VPN connection now.
Check Device Manager
It is possible that Windows Device Manager shows that the Cisco AnyConnect adapter is showing as disabled. You should try the following to correct this:
- Open a search
- Search for Device Manager
- Select and open it
- Open Network Adapters
- Right Click on the AnyConnect adapter
- Select Update Driver
That should clear out any issue in Device Manager from the initial install.
Beware Private/Public Networks Using the Same Name
If your work environment has a public access point for the VPN when you are away from work as well as a private access point for when you are using the network at work and its sharing the exact same name, you will have difficultly getting both to work with the same name. Why? Because when you first accept the certificate it will store it with that name and the IP address and since that IP address can't match both for public and private connections, one of them is doomed to fail. You could delete the certificate each time you switch. But an easier way is to access the VPN by the IP address itself. Instead of using the nice friendly name, you can type the numeric IP address into AnyConnect and accept the certificate for that separately. You can have one entry in the client by name and another by numeric IP address or have two numeric entries. To find out the IP address: Windows-R, "cmd" [Enter], "ping -a vpn.nice.name.com" [Enter] .
Advertisement